translate

Minggu, 29 November 2009

New Bits at Black & Spiro


We've finally received our delivery of Megan Park cushions in at Black & Spiro along with some of our other lovely cushions {top image}. I thought I would take a couple of photos of some other bits which we just received in last week. The little Antique brass mirror is one of my favourite things in the shop at the moment and the colourful ginger jar lamp bases are divine!!

For all enquiries, please email us info@blackandspiro.com.au

Darling Thread Spool Christmas Ornaments - A Complete Tutorial

EDITED 12/27/09 to ADD: These are great little tree ornaments, but they can also be used as tassels around your workshop, on your kitchen cabinets, even on your rearview mirror in the car. (which I just happen to have in my own car!)
-------------------------------------------------------------------------------------------------
It seems this project has gotten a lot of exposure in blogland already, so rather than post each link up individually (which makes this post grow even longer), I decided to shorten it up a bit.
I'm linking up with all the following blog parties. Please be sure to go visit them after you've read through mine.
Funky Junk's Weekly Saturday Night Special
 The DIY Showoff's Holiday Highlights Party. (Made the features!)
It's so Very Creative with It's So very Cheri
Head on over to Infarrantly Creative for Pennywise Presents

Joining another party over at Cottage Instincts with these great ornaments.

Tuesday is DIY day over at A Soft Place to Land. These ornaments are the cutest and easist DIY I've done in a long time, so I wanted to share over there also.
Really, I'm stopping after this one.  But I had to join Today's Creative Blog with Get Your Craft On.

------------------------------------------------------------------------------------------------
I spent several hours making these charming little tree ornaments last night. I was so pleased with the way they turned out that I wanted to share with you how to make some of your own.

These would be great for most anybody on your list, the seamstress, the crafter, or even yourself.
I happened upon a bundle of vintage wooden spools in an antique store a while back and have been saving them for the perfect project. So, taking a cue from a photo I once saw of some paper covered spools, and adding my own spin, I fashioned these great little ornaments for the tree. I suppose these could also be used as a tassel. Ohhh, imagine these hanging off the knobs on the cabinets in your work space!

Anyhoo, Here's how to make your own:
First you'll need to gather all of your supplies. Don't be caught needing something in the middle of your project.
Start by gathering your spools and some pretty papers. (When choosing papers, select some that contrast. If you choose ones that are too matchy, your ornaments won't pop as much when they are all together.)
If you can't find vintage wooden spools, you can buy some smaller wooden ones in the unfinished wood section of your craft local store.
Then rally up the rest of your goodies. You'll need the following:
Beads in multiple sizes, shapes, and colors
Jewelry wire or heavy thread
Needles in various sizes:
 One to fit inside the beads, one to fit the length of the spools, and one to sew through the ribbon
Double Stick Tape, heavy duty, thick width, or Mod Podge
Paints in various colors, Apple Barrel or Ceramacoat work great for these small projects
Small paint brushes, you'll need several so you won't have to wash them in between color changes
Small Ribbons, various colors or patterns, 1/8" works best
Drill and a very small bit, about 1/8"
Clear Drying Craft Glue, be sure that it's a good one, and it MUST dry clear. For those of you that use E6000, it will yellow over time. Don't use hot glue for this project, not even high melt. It will separate over time also. The wood is not pourous enough to support it well.
Dowel Caps, small (you can find these in the unfinished wood section of the craft store)
Pliers and Tweezers
A Scrap piece of wood

Ok, let's get started!!


Part 1

Measure all of your spools for the width and length you'll be covering up. Lay out your papers, mark your measurements, and start cutting. Since your spools will most likely be different sizes, you'll want to number them. Put your number in the middle of the spool since you won't be painting over that part.

Cut your papers and number them as well. This way you won't get confused as to which paper goes to which spool.
Once you have all of your papers cut, and your spools and papers numbered, set the papers aside.

It's time to paint your spools and dowel caps. Gather a few colors that match your fabrics. You only need to paint the ends and a little way into edge. Hold the middle while you paint both ends. After you paint each one, thread it onto a small wire so that the paint isn't touching anything while it dries. I use one of those 24" needles for things like this.
Before you paint your dowel caps, you'll need to drill a small hole in the top. Turn them upside down, grip them in the circular part of a pair of pliers, and drill softly through them into a piece of wood.
Since these are a bit tricky to paint, I put my tweezers through the hole from the top and paint them while holding that way. Makes it much easier!


Part 2
While your spools and caps are drying, lay out all of your paper strips and start planning how you want to attach your beads. For the biggest impact, use varying sizes, shapes, and colors on each one. I used a lot of the same beads on most of mine, but mixed them into different drop patterns.

Once all the paint is dry you can start putting the papers on the spools. I use heavy duty double stick tape for this, but you can use Mod Podge if you want.
When you have the paper on, your spools should look like the one in the last picture.

Now, glue a dowel cap to one end of each spool and set aside to dry while you thread the beads. This end will be the bottom of your ornament.


Part 3
Take your jewelry wire or heavy thread (I use upholstery thread), and begin to thread your beads. When you get to the last bead, wrap the thread on the outside of the last bead and start to pull your needle back through the others, all the way to the top.
Leave enough thread or wire that you can go back to these later and pull them through the spools.

Set all of your prepared bead drops aside. Take the rest of the dowel caps, prepare a hanging ribbon and push it though the small hole. Knot the ends several times until you have a knot big enough to hold without pulling through.


Part 4
It's time to start threading the bead drops into  the spools. Use the needle that has a thick enough eye for the thread, but thin enough shaft to push through all those knots in the ribbons. I use my pliers to pull them through.
Once you've threaded the beads through the spool, grab one of your hanging ribbons, and push the thread through the knot in the ribbon.
Next, remove your needle and pull the thread (one in each hand) until the knot is sitting right at the top of the spool. Then tie a few knots in the thread. Cut it off, leaving about 1/8" tip on the threads.


CROSSING THE FINISH LINE
Now that your knot is secure, put glue on the end as shown in the picture. Cover the ribbon knot, which will in turn cover the thread knot. Hang your ornament up and then push the dowel cap all the way down. Let it hang until it dries.

When you're all done with that, you're all done!
Here's what you'll have:


Aren't these just darling?! I'll be selling mine in the etsy store, but I think I'll make me some more when I find more wooden spools. If you have any you don't want....uhhh....just send them on my way please!
Happy Crafting!

Kamis, 26 November 2009

Show & Tell Friday

I'm joining Cindy over at My Romantic Home for Show & Tell Friday.

Since my blog is fairly new, I'm pulling out an earlier post to link up with.
If you haven't seen this post already, click here to read about my obsession with old silver.
When you're done reading my post, head on over and see what everyone else is showing off.

Ashgrove House


Images above and below you may be able to spot the floor in the sun room to the left which we had painted in a green and white stripe. We will be doing some beautiful white cane pieces upholstered in lovely bright fabrics in this area in the New Year.


Here are some photos of a job I finished off this morning for a lovely, lovely client at Ashgrove. The brief was to create an area which was fresh, bright, colourful and family friendly. This is what I created.

Giveaway Winners

Good Morning and Happy Thanksgiving!

It's time to announce the giveaway winners for my very first giveaway! I put all the names into a silver bowl, covered it up, shook it hard, and had my husband draw the names for me.
So here's how I planned it. The first name he drew gets the first prize, the second name gets the second prize, and the third name gets the third prize. And sticking to the plan, here are the winners in order.


The winner of the work apron is:


The winner of the fabrics and trims is:

(Sorry Donna, I know you requested the apron, but I know you'll find something great to do with the fabrics and trims. I'll pick you out some really pretty ones - I promise.) If you have particular color requests, let me know. Believe me, I have everything -seriously!

The winner of the stocking/pillows is: (no surprise here, she scored 8 entries with her referrals!)


Congratulations to all of you!!

Now, here's what I need from each of you:
I need your address, and your color combination preference
(Edited to add: I couldn't find a working link to email on Kim's blog, so if any of you know how to get in touch with her, could you please send her over? I'll leave a comment on her current post and see if she gets it. BTW, if you haven't seen this blog, you must go over and check it out. Fabulous!)
2. Donna @ Funky Junk
I need your address and your color preferences
3. Brenda @ Cozy Little House
I need to know if you want a stocking/pillow combination, 2 stockings, or 2 pillows

Please remember, once you receive your gifts, you should post about them on your blog and link back to mine. For the winner of the fabrics and trims, you can wait until you make something with it if your like. We'd certainly like to see what you created from it.

Just an FYI, I will be sponsoring a few giveaways in the very near future, and they will all be work aprons! So you'll have more chances to win one. The store will be open next week, and if you can't wait to win, you can purchase one! I can't wait to show you these.

Minimalist And Contemporary Home Design

Contemporary living room photo gallery


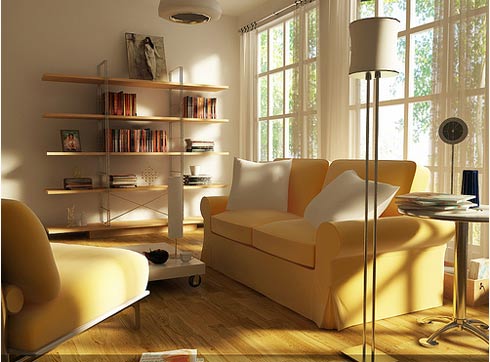
A contemporary and minimalist design that creates an open space feel, comfort and relaxation, luxury accommodation is more comfortable than you expect because the feeling is created by maximizing spatial origin. With the Alabaster white walls provide atmosphere bright, high ceilings and large windows offering natural light and views of the page, which is the house we will be moving today.


Modern Living Room Interiors Ideas photo gallery

Setting Living Room For the Family Room

Living Room, Living Room Design
Living Room

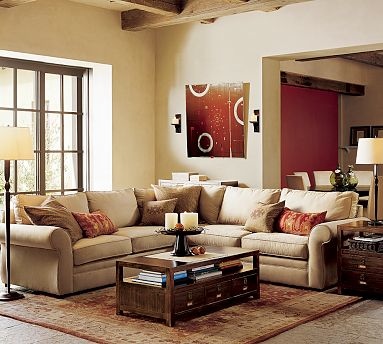
In determining your family room should have a good concept, a symmetrical arrangement of formal impressed, try it with an asymmetrical arrangement might be more interesting.


Living Room, Living Room Design
Living Room

Rabu, 25 November 2009

Black & Spiro Today


I love the new painting we have just received into the shop by Diana Favell...thought you would love to see a photo of it. It's so big and gorgeous!!

Selasa, 24 November 2009

How much is that doggie in the window?


I brought Ned into work today in an attempt to cheer myself up. His favourite spot in the entire store was sitting in the front window next to our beautiful new curtains watching the traffic and passers-by. I couldn't resist snapping this photo above.

Country Road Christmas Catalogue


It was lovely to receive the Country Road Christmas catalogue in the mail last night. It's filled with lots of great gift ideas. I absolutely loved the cover which I have posted above.

Modern House Interior Design

Interior Design, House Interior Design, Home Interior Design, Modern Interior Design
House Interior Design


Interior Design, House Interior Design, Home Interior Design, Modern Interior Design
House Interior Design

Dominated Color Interior Design In 2010

Interior Design, Color Interior Design, 2010 Color Interior Design

In the 2010 Interior design is still dominated by bright colors, maybe for those of you who will build or remodeling house should consider the bright colors for the year 2010. By looking at this picture will be ideas for your home.

Interior Design, Color Interior Design, 2010 Color Interior Design

Senin, 23 November 2009

Overloaded


It seems I am a little overloaded this week along with suffering an awful summer flu...may have to take a couple of days away from here. I promise I'll be back soon!

xo
Anna

illustration by samantha hahn

Tail of the Yak.

I have found this shop through blogland and I am in love with it. It is one of those curiosity shops with the neatest stuff. Anandamayi Arnold makes and sells high quality party favors, she has a wonderful eye for curious, beautiful things . Click here to read more.


Image via here.


Image via here.


Image via Inspire Co.

Image of artist Anandamayi Arnold creating some of her signature surprise shells, balls and flowers. Click here to read more.
Image via Inspire Co.

Here is one of her surprise flowers, isn't amazing?

Minggu, 22 November 2009

A Mini Celebration and a Few Giveaways

Monday morning I start my new life. My new life as a stay at home worker! I'm officially coining SAHW just for me. I've had my own business for many years, but at the first of the year I decided to give it up and go to work for a company. Self employment can be rough during an economic downturn, and keeping employees has been tough. So, I went to work managing a sewing machine company.
While working my new job, a series of things just fell into place when I least expected it, and now I've decided to leave that job and pursue my first creative love. I design women's work aprons. Not just any apron, but a bonafide, certified, carry everything on you that you need, apron! Not the ruffled fluffy kind, but the stay with me while I work and don't move an inch unless I want you to kind. They are pretty, and they are practical..................which is my mission in life - to create pretty and practical fun things.
I finally found a factory to make them so I can sell bulk quantities to distributors and fill retail orders once I get the store opened. And, now that I have no commitments to anyone but myself, I'll be getting that store open very soon.

So, that's one reason I'm celebrating today. The other? Well it's you guys of course. Back in the beginning of my blog I promised to do a giveway once I reached 50 followers, and then each 50 followers thereafter, up to 500. I know I said I'd give a gift to follower #50, #100, and so on. What I didn't know back in those early days was that you don't know specifically who joined in number order. So, everybody's name goes in the hat. (Please don't ask me to use random generator. I barely have basic blogging figured out!)

Here's the deal....................
You get your choice of gifts. There are three to choose from.
Option #1 is one of Make Mine Beautiful's exclusive work aprons!
Here's a few snippets of what it looks like.

Option #2 is a selection of fabrics from this shelf:

AND, a few trims to match from this wall:


And Option #3 is a Christmas Pack that includes one of these stockings, and a sofa pillow to match! Or, two stockings and no pillow, or 2 pillows and no stockings.


Of course every giveaway has it's rules, and here are mine:
1. The giveaway is open until Wednesday night at midnight, mountain time. The winner will be announced on Thanksgiving morning.
2. If you are already a follower, your name is already in the hat - well, in the silver bowl actually. Feel free to post a comment telling me which gift you'd prefer.
3. You must be a follower to win this giveaway, since it is a follower appreciation giveaway, but you do not have to have a blog.
4. If you encourage someone else to follow my blog, be sure to have them tell me who sent them over in their comment. They will get one entry, and you will get another one. For each person you send my way, you get an additional entry. Feel free to link to this giveaway. If I get a lot of entries, I'll give away all three gifts.
5. Regardless which gift you choose, to win you MUST be willing to post a picture of it in use on your blog. If you choose the fabrics and trims, once you make a project from them, you would post about that. If you choose the apron, we must see you wearing it and give us your feedback on it. If you post the stockings or pillows, you would show us where you used them. IF YOU DO NOT HAVE A BLOG, you would email me the pictures and I will post about it here on mine.

That's it, Easy peasy. Good luck to each of you. These are really nice gifts I'm sure you will enjoy.


Sabtu, 21 November 2009

Home Interior Design by Santasel

Home Interior Design, Interior Design, Chinese Home Interior Design, Home Decorating


Home Interior Design, Interior Design, Chinese Home Interior Design, Home Decorating


The good news is that there are many home designs and interior design projects that you can do easily and stick to your budget at the same time. There are little things that you can do, which will make dramatic improvements to your home in no time flat. For example, any home design or interior decorator will tell you that a good way to give those walls a new look or a face lift is with wallpaper. Wallpaper is fairly cheap and comes in such a wide variety of designs that you will have no problems finding something to suit your tastes.

Wooden Home Interior Design

Wooden Home Interior Design, Home Interior Design, Interior Design, Livingroom Interior Design
Wooden Home Interior Design

Before you start with the interior design, you need to think about your choice of furniture. What type of furniture appeals to you most? Do you look for comfort? Do you look for style? Do look for sophistication? All of these elements matter when choosing the right furniture for your home. This will help you in choosing materials.

Wooden Home Interior Design, Home Interior Design, Interior Design, Livingroom Interior Design
Wooden Home Interior Design

TV Alert - Catch me this morning on HGTV

Although my work in TV is behind me, it seems they are airing plenty of reruns, so I wanted to share.
Today on Carter Can, (more info on the episode), we redo the backyard of a row house in Denver for a single mom of three kids.
I LOVED this episode. The family was so fun to work with, and Julie was truly a genuinely wonderful person. I kept up with her long after the show. In fact, I think I might call her after the episode and see what she's up to. She helps in the summer with a craft market called the Sweet William Market. (When summer hits again, I'll give you the details on that.)
She wanted a backyard that would be a good gathering place for her kids to have their friends, and a place that she could host small parties. Wait till you see the water fountain feature that Jake came up with. I asked him to come up with a water fountain for the garage wall, and he really hit it out of the park, as he always does. Frank, who is head of construction, and who you don't see in the shows, is equally as creative. We all threw in our ideas and Jake created a masterpiece. Seriously, you have to see it.
My job was to design the yard makeoever, and make a lot of the fun things. In a yard that small, it was a bit tough, but it ended up being one of my most fun project.

Here are a few highlights from the project:
Here's the before:


NOW HERE'S THE AFTER !!


We added everything to the garage wall you see in the corner. That's where the water fountain is. Julie already painted the outside a fabulous green, so we went with it.
The little row house scape you see on the fence was built from plywood. She wanted some color on the fence, and I found a great little picture -at Big Lots of all places! - and recreated it on a larger scale in wood. This is featured on the show, so I won't go into details.

We built her a cabinet to house her tv that could stay outside through the seasons. It's weather-proof wood, and it's sealed on the insides. She loved it!

One of the things she wanted was a place for all of the kids to set their beverages and such, so while Frank and I were at the landscape yard picking up all the pots you'll see on the deck, I spotted a pallet that I thought would work great. See how I turned this into a table on the show! This was a fun project. (I have 2 more pallets sitting in the garage waiting for me to do the same thing to them! Some day.....

Isn't this great?! All of those tiles are glued down so they can be used as permanent coasters.

I used 8" cuts of 4x4 lumber, and then added fence posts toppers turned upside down to the bottom for a little added curvature. I cut out the shelves of the pallet so that I could fit the legs in cumpletely under the table top. The pictures don't show just how cute this really was.

Here is that TV cabinet, built from scratch. I love the color we stained this.


Here are a few more detail pictures from around the yard:
This glass mulch is awesome.................but it is sharp!! I have the 2 leftover bags somewhere in my garage. Hmmmm. Think I'll have to pull those out at the first sign of green grass.


Is this not just incredible? I want one for myself. That's copper gutter that carries the water.


And we didn't forget the other deatils either...........................doesn't every spot of water deserve it's own ducky?!


This added so much color! Aren't all the colors in this yard fantastic? Not only cute, but functional to boot. I added a rod to hold her tablecloths on one of the houses, and a flower basket on another.


I just screwed this directly into the fence.

Color, color, everywhere!!!


LinkWithin

 
coompax-digital magazine